52°North SOS Importer
The 52°North SOS Importer is a tool for importing observations from CSV files into a running SOS instance. Those CSV files can either be locally available or remotely (FTP support). The application makes use of the wizard design pattern which guides the user through different steps. This tutorial shows, how to load a locally available CSV file into a running SOS instance.
Workflow
The workflow would be:
- Start SOS Importer Wizard
- Choose CSV File
- Define CSV File Metadata
- Choose Metadata for the selected Column
- Complete Time Data
- Add missing Metadata
- Add missing Positions
- Final Configuration
- Final Step
Start SOS Importer Wizard
At first you need to download the current SOS Importer Wizard
(52n-sos-importer-wizard-0.4.2-bin.jar)
and the current SOS Importer Feeder
(52n-sos-importer-feeder-0.4.2-bin.jar) (a copy can also be found unter /home/demo/workshop/sos-importer).
When the files are downloaded you can store them together in a folder of your choice. Next you need
a csv-file with data you want to import. You can download the example csv-file which is used in this tutorial
here: Download (a copy can also be found unter /home/demo/workshop/sos-importer)
After that you need to make sure you have a running SOS instance. If you do not have a running SOS instance you can check out this tutorial, how to set up a SOS: Tutorial
Now you can execute the 52n-sos-importer-wizard-VERSION_NUMBER-bin.jar which will guide you
through the process of setting up the import of the csv-file.
# Activity 1
- Download the SOS Importer Wizard
- Download the SOS Importer Feeder
- Download the
example-data.csv- Make sure you have a running SOS instance
- Execute the SOS Importer Wizard
Choose CSV File
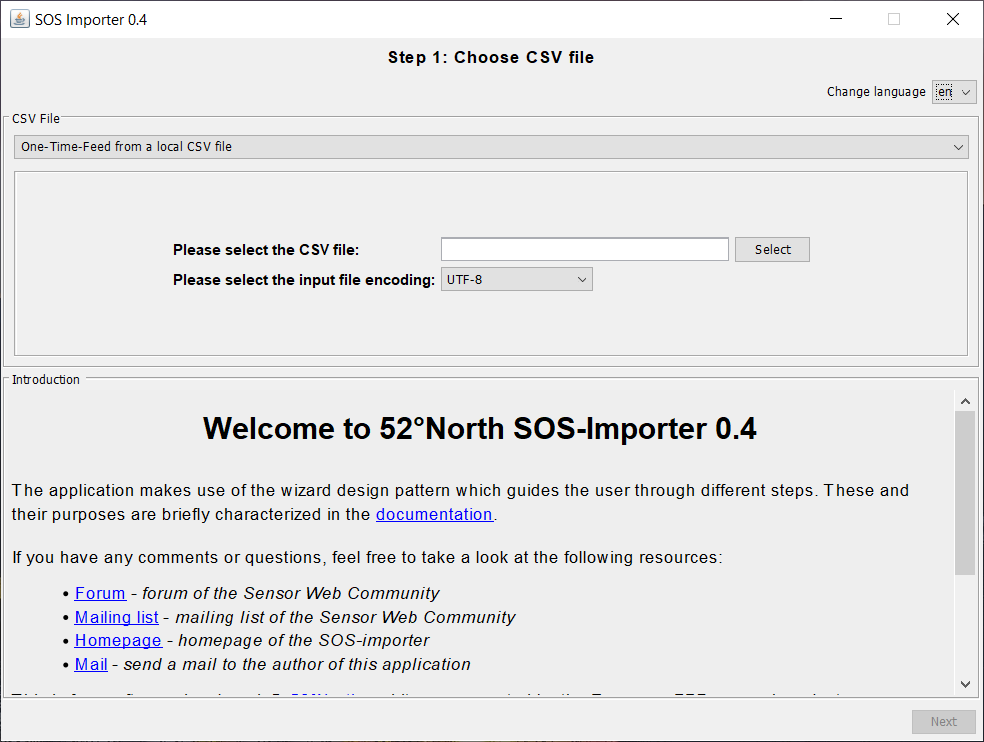
After you execute the SOS Importer Wizard the following window opens. There you select the csv-file
you want to import into the SOS. Moreover you can change the language between English and German and
you can choose if you want to use a One-Time-Feed from a local CSV file or a
One-Time-Feed/ Repetitive Feed from a FTP-Server. In this tutorial we choose the
One-Time-Feed from a local CSV file.
# Activity 2
- Change the language to your language (supported languages are English and German)
- Select in the dropdown-menu
One-Time-Feed from a local CSV file- Select the
example-data.csv- Select
UTF-8as the input file encoding- Continue by clicking on
Next
Define CSV File Metadata
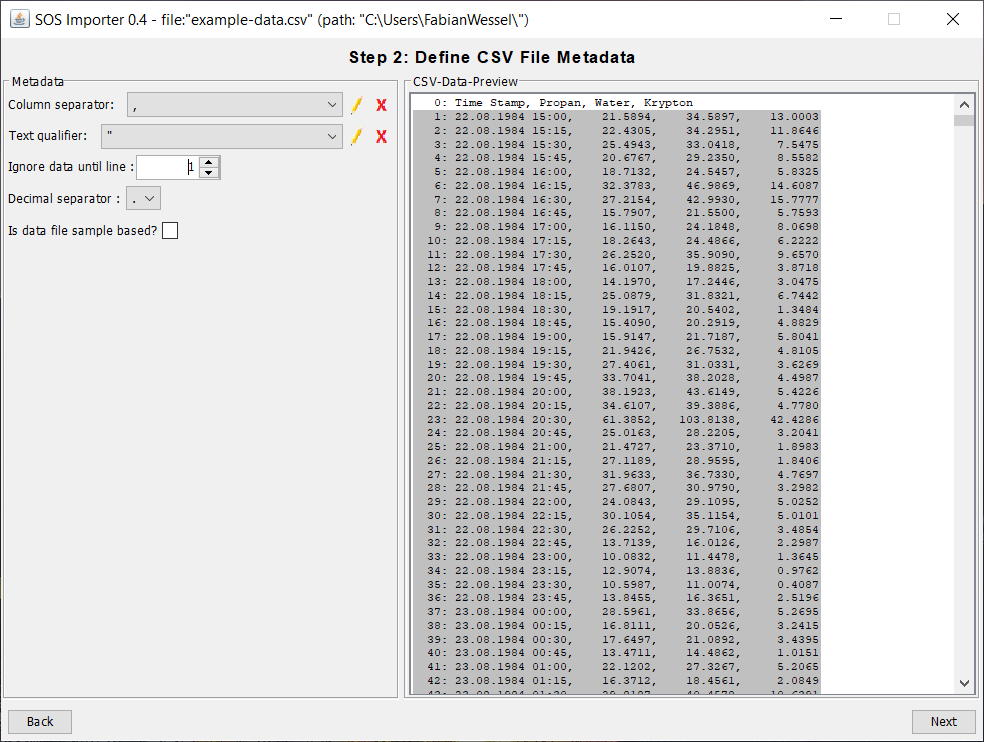
In the next step you select the column separator, the text qualifier and the decimal separator of the csv-file. Also you can choose until which line the data should be ignored. In this tutorial we choose 1 line because the headings of the columns should be ignored.
# Activity 3
- Choose as column separator
,- Choose a text qualifier
"- Ingore data until line 1 to leave out the column headings
- Choose as decimal separator
.- Continue by clicking on
Next
Choose Metadata for the selected Column
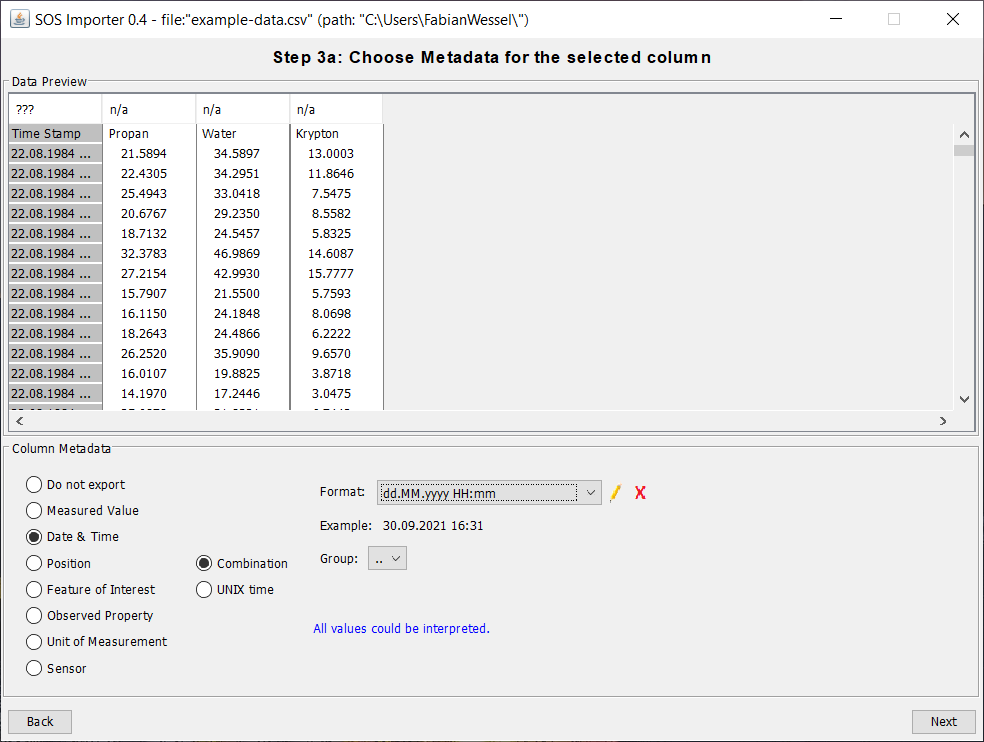
In this step you need to choose the metadata for the selected column. In the example data the first column contains the date and time. For the date and time you need to choose a format from the dropdown-menu. When the needed format is missing, you can add it by clicking on the pencil.
# Activity 4
- Select the metadata
Date & Time- Select the format
dd.MM.yyyy HH:mm- Continue by clicking on
Next
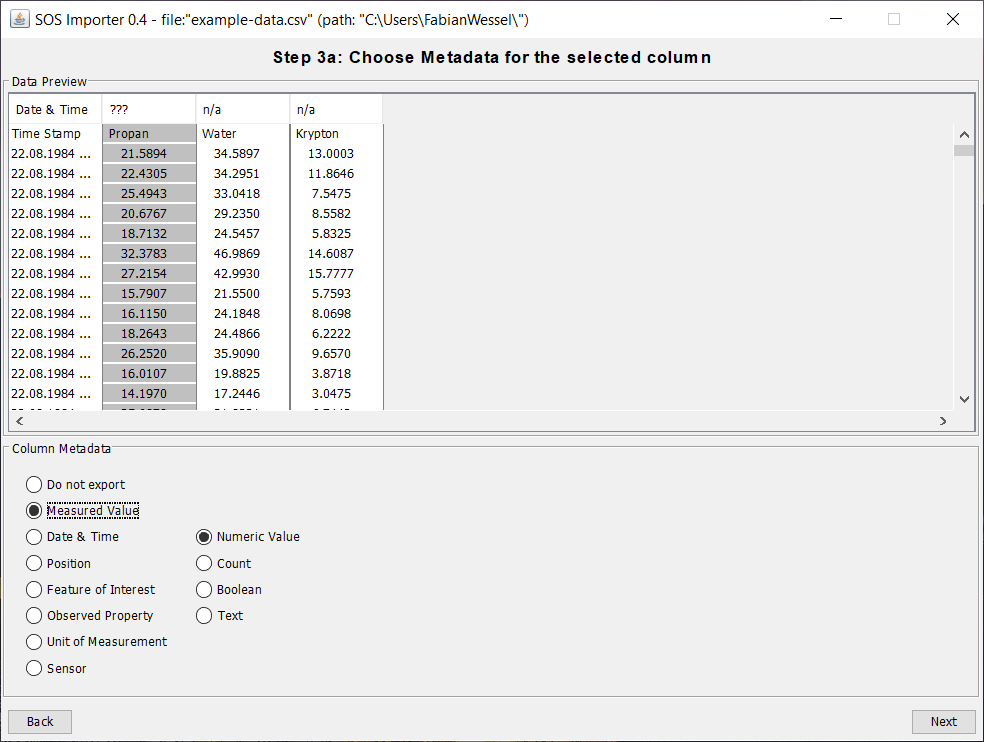
The other three columns contain measured values which are numeric values.
# Activity 5
- Select the metadata
Measured Value- Select the type
Numeric Value- Continue by clicking on
Next- Repeat this activity for the columns 3 and 4
Complete Time Data
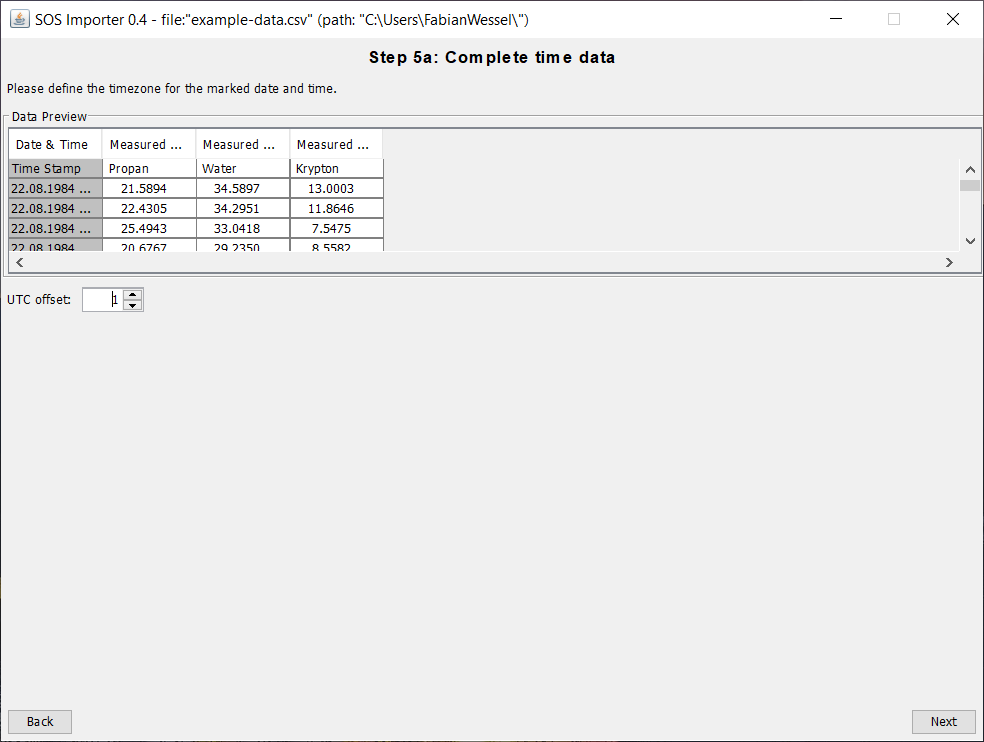
After that step you need to define the timezone for the marked date and time by setting an UTC offset.
# Activity 6
- Define the timezone for the marked date and time by entering the UTC offset
- Continue by clicking on
Next
Add missing Metadata
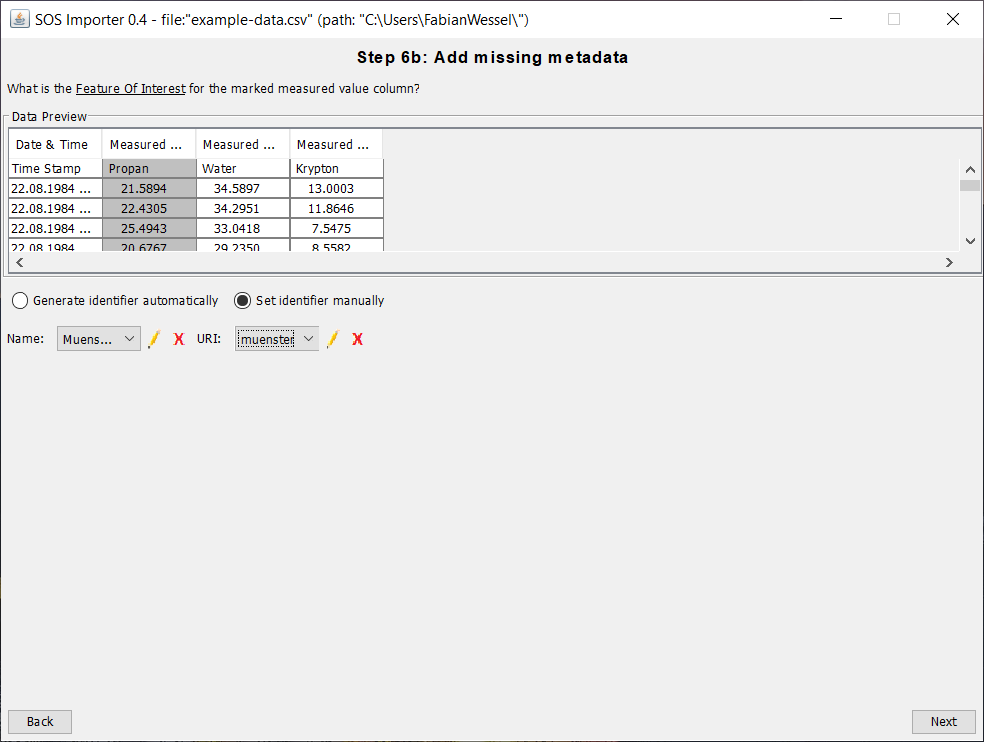
Now you only need to add the data which is missing in the csv-file. First you need to add a
Feature of Interest to every column of measurements. Select Set identifier manually and add your
Feature of Interest by setting a name and a URI.
# Activity 7
- Select
Set identifier manually- Add a Name for the Feature of Interest
- Add an URI for the Feature of Interest
- Continue by clicking on
Next- Repeat this activity for the columns 3 and 4
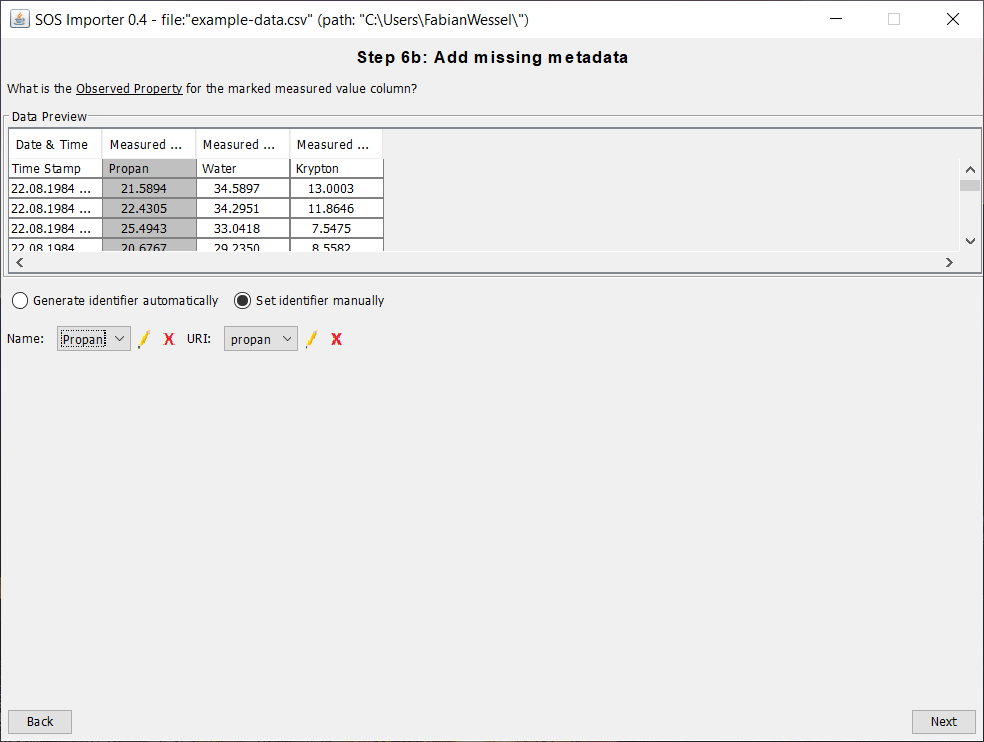
Next you need to choose an Observed Property for every column of measurements.
# Activity 8
- Select
Set identifier manually- Add a Name for the Observed Property
- Add an URI for the Observed Property
- Continue by clicking on
Next- Repeat this activity for the columns 3 and 4
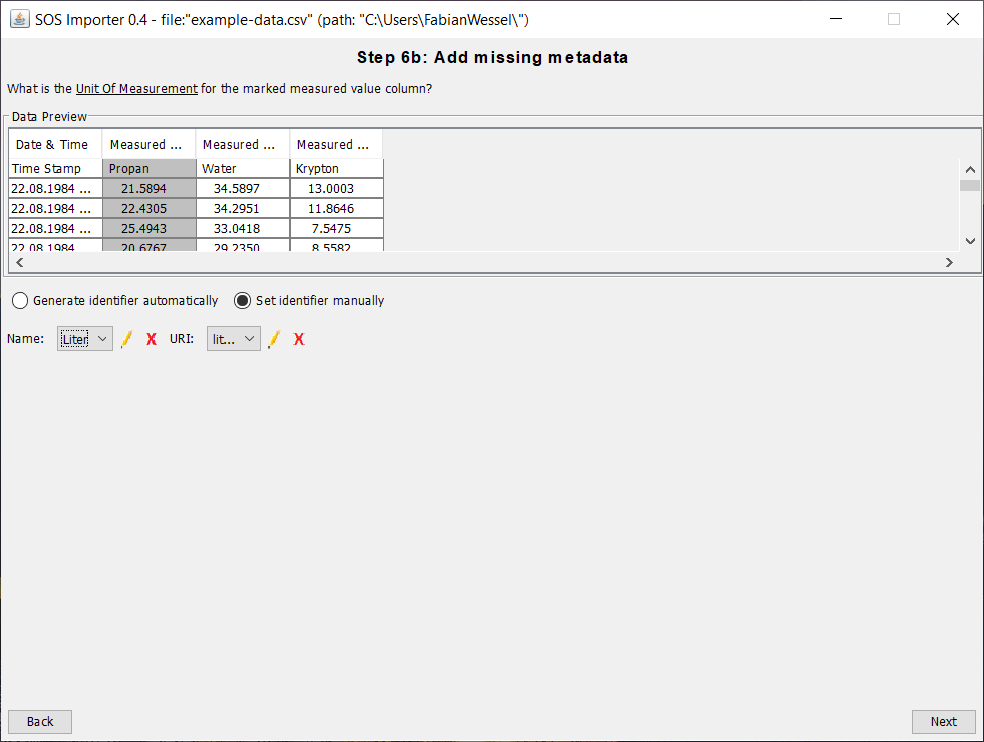
Following you need to set a Unit of Measurement for every column of measurements.
# Activity 9
- Select
Set identifier manually- Add a Name for the Unit of Measurement
- Add an URI for the Unit of Measurement
- Continue by clicking on
Next- Repeat this activity for the columns 3 and 4
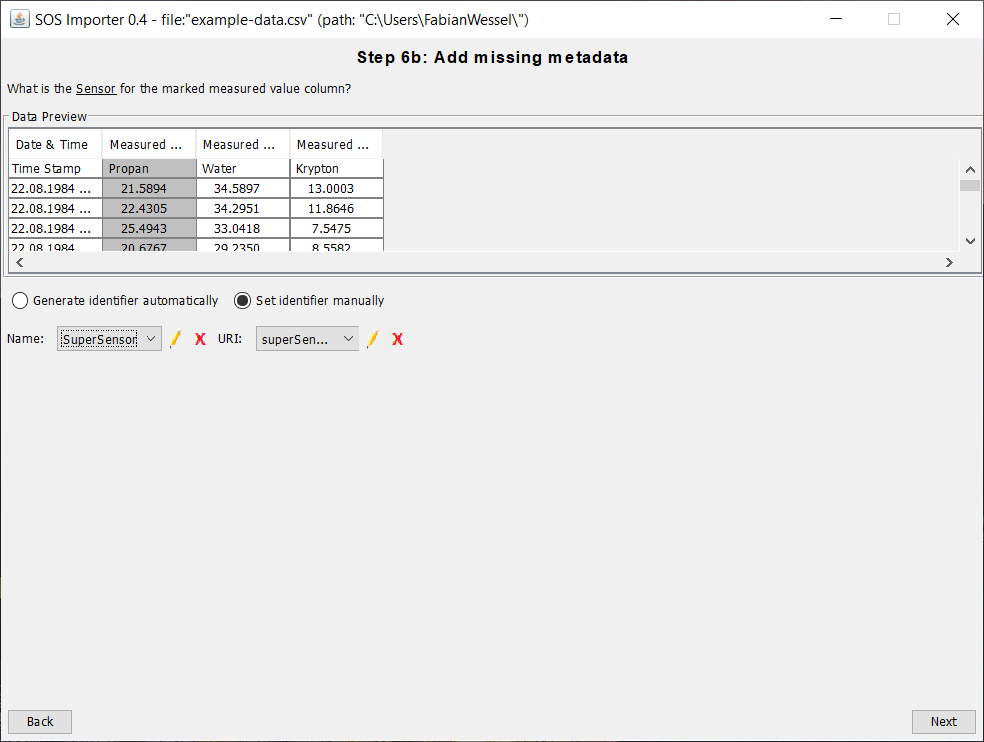
Last you need to add a Sensor to every column of measurements.
# Activity 10
- Select
Set identifier manually- Add a Name for the Sensor
- Add an URI for the Sensor
- Continue by clicking on
Next- Repeat this activity for the columns 3 and 4
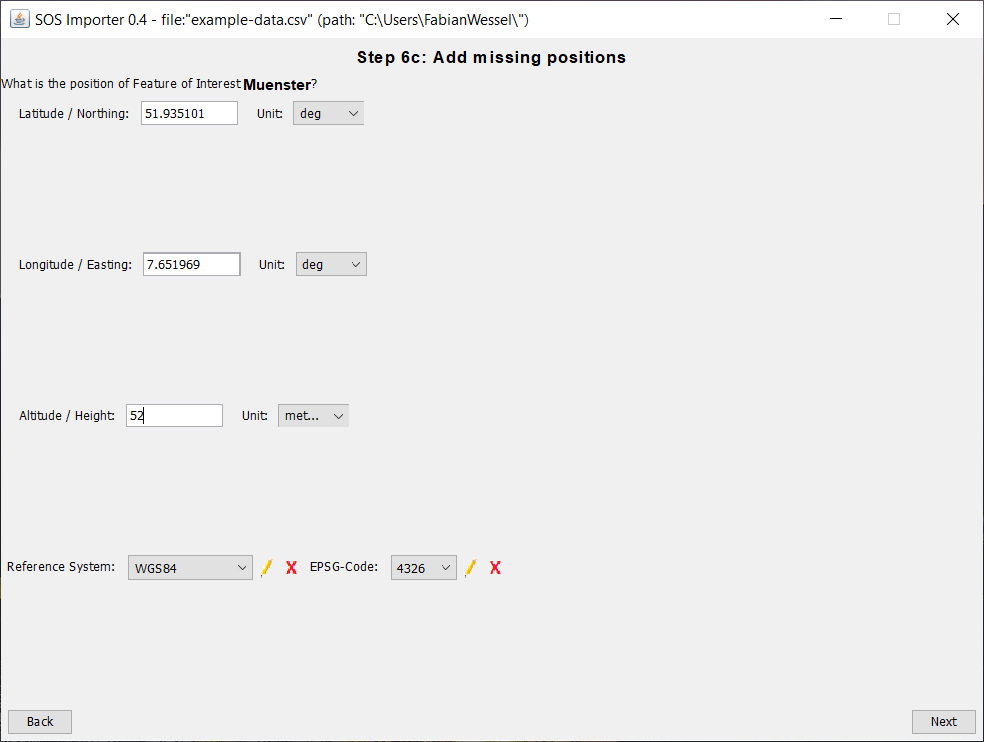
Add missing Positions
In this step you need to add a position to the Feature of Interest by adding a latitude,
a longitude and an altitude. WGS84 is the reference system in this tutorial.
# Activity 11
- Add a Latitude for the Feature of Interest
- Add a Longitude for the Feature of Interest
- Add a Altitude for the Feature of Interest
- Select
WGS84as reference system- Continue by clicking on
Next
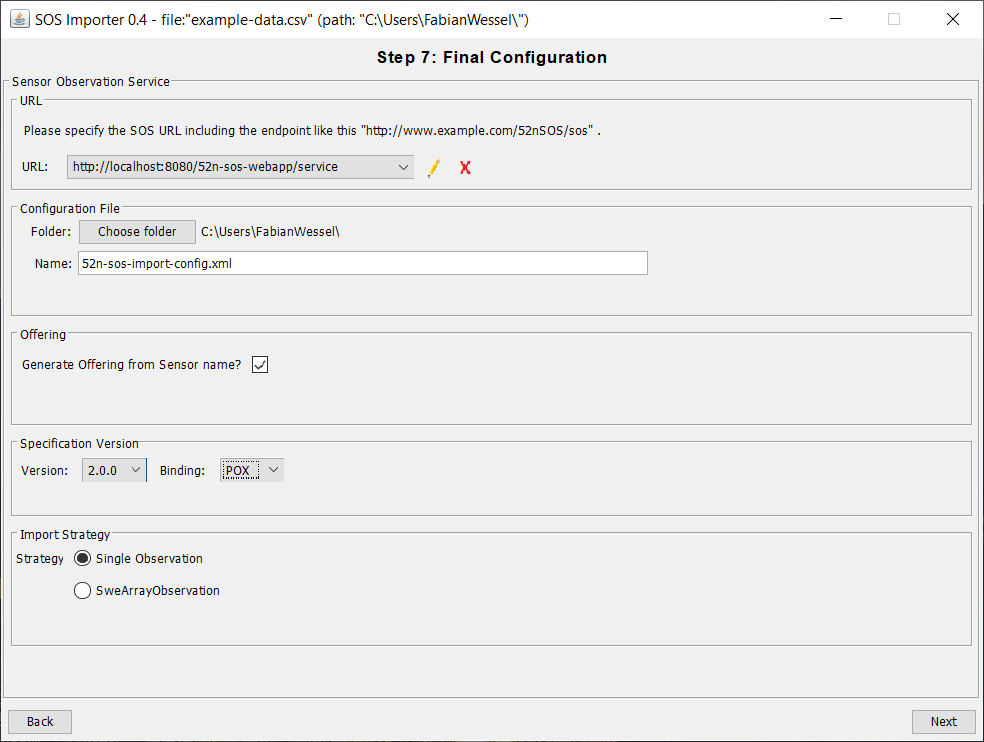
Final Configuration
In this final step of the configuration you need to add the URL of the SOS, choose a folder for the
configuration file and name the configuration file. In this tutorial the offering is generated from the
sensor name, the specification version is 2.0.0, the binding is POX and as an import strategy
Single Observation is used.
# Activity 12
- Enter the URL of the SOS (here:
http://localhost:8080/52n-sos-webapp/service)- Choose a folder where the configuration file should be saved
- Enter a name for the configuration file
- Activate the generation of the offering from the sensor name
- Choose the specifictation version
2.0.0and the bindingPOX- Select the import strategy
Single Observation- Continue by clicking on
Next
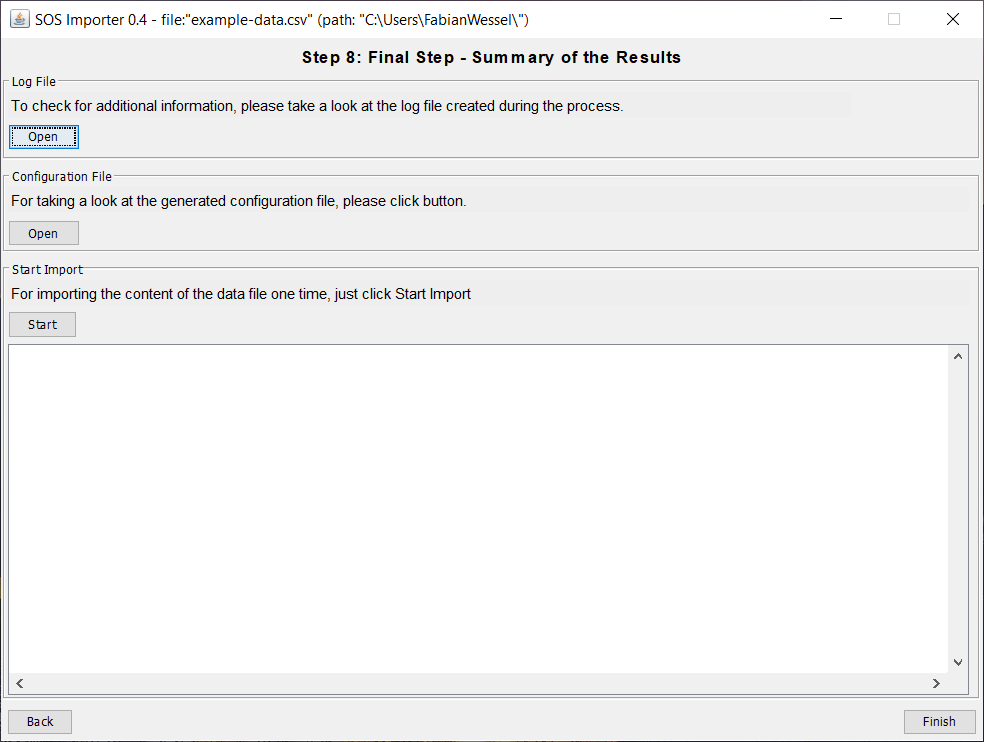
Final Step
When you see this window, a configuration file was generated and stored at the defined location.
By clicking on Start you can now start the import of the data file.
# Activity 13
- Start the import of the csv-file by clicking on
Start
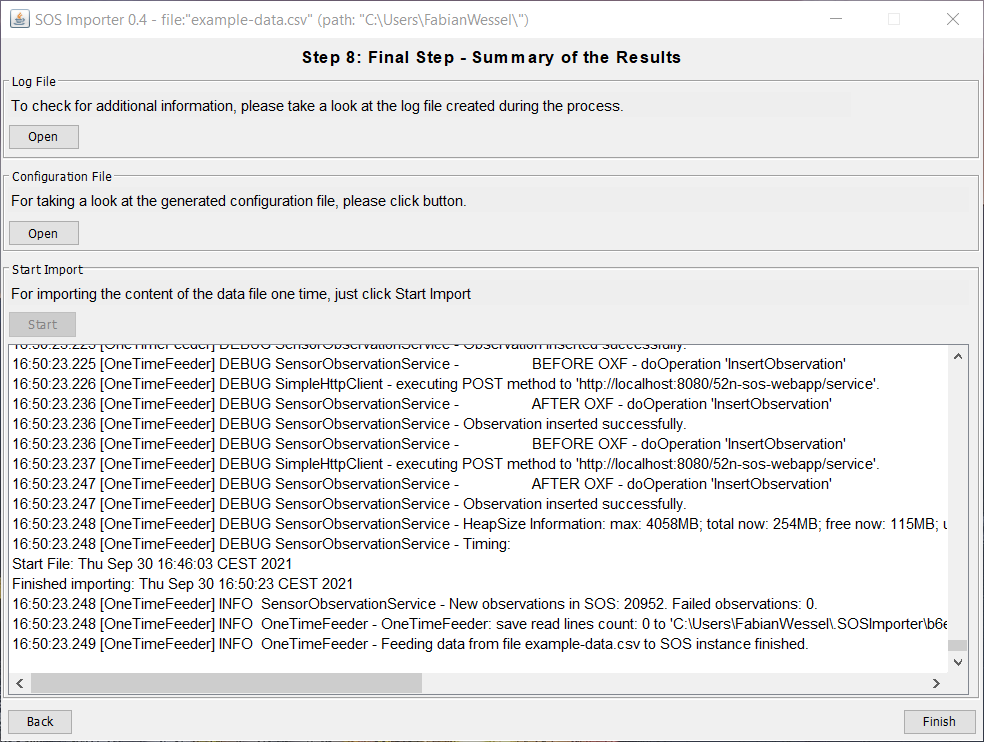
After the import is finished the window should look like the following. Now you have successfully
imported the data from the csv-file. You can close the window by clicking on Finish.
# Activity 14
- Close the SOS Import Wizard by clicking on
Finish
